


Taking photos with a smartphone camera is a norm these days. But when it comes to capturing nighttime or low-light photography, it can pose a challenge for smartphone users. This includes the likes of motion blur and digital noise. Other times, images become too dark due to the nature of its environment. As frustrating it may be, here are 6 tips for taking low light pictures with a smartphone.
1) Stability Matters
We’ve all been there before: a nighttime shot in the dark or dimly-lit environment that ends up with an awful motion blur. Fortunately, you can prevent this from happening again by learning how to stabilise your phone. That means investing in a quality tripod specially designed for smartphones. It helps to keep your phone still and steady as night photography requires long exposure to fulfil a clear and sharp-looking result.

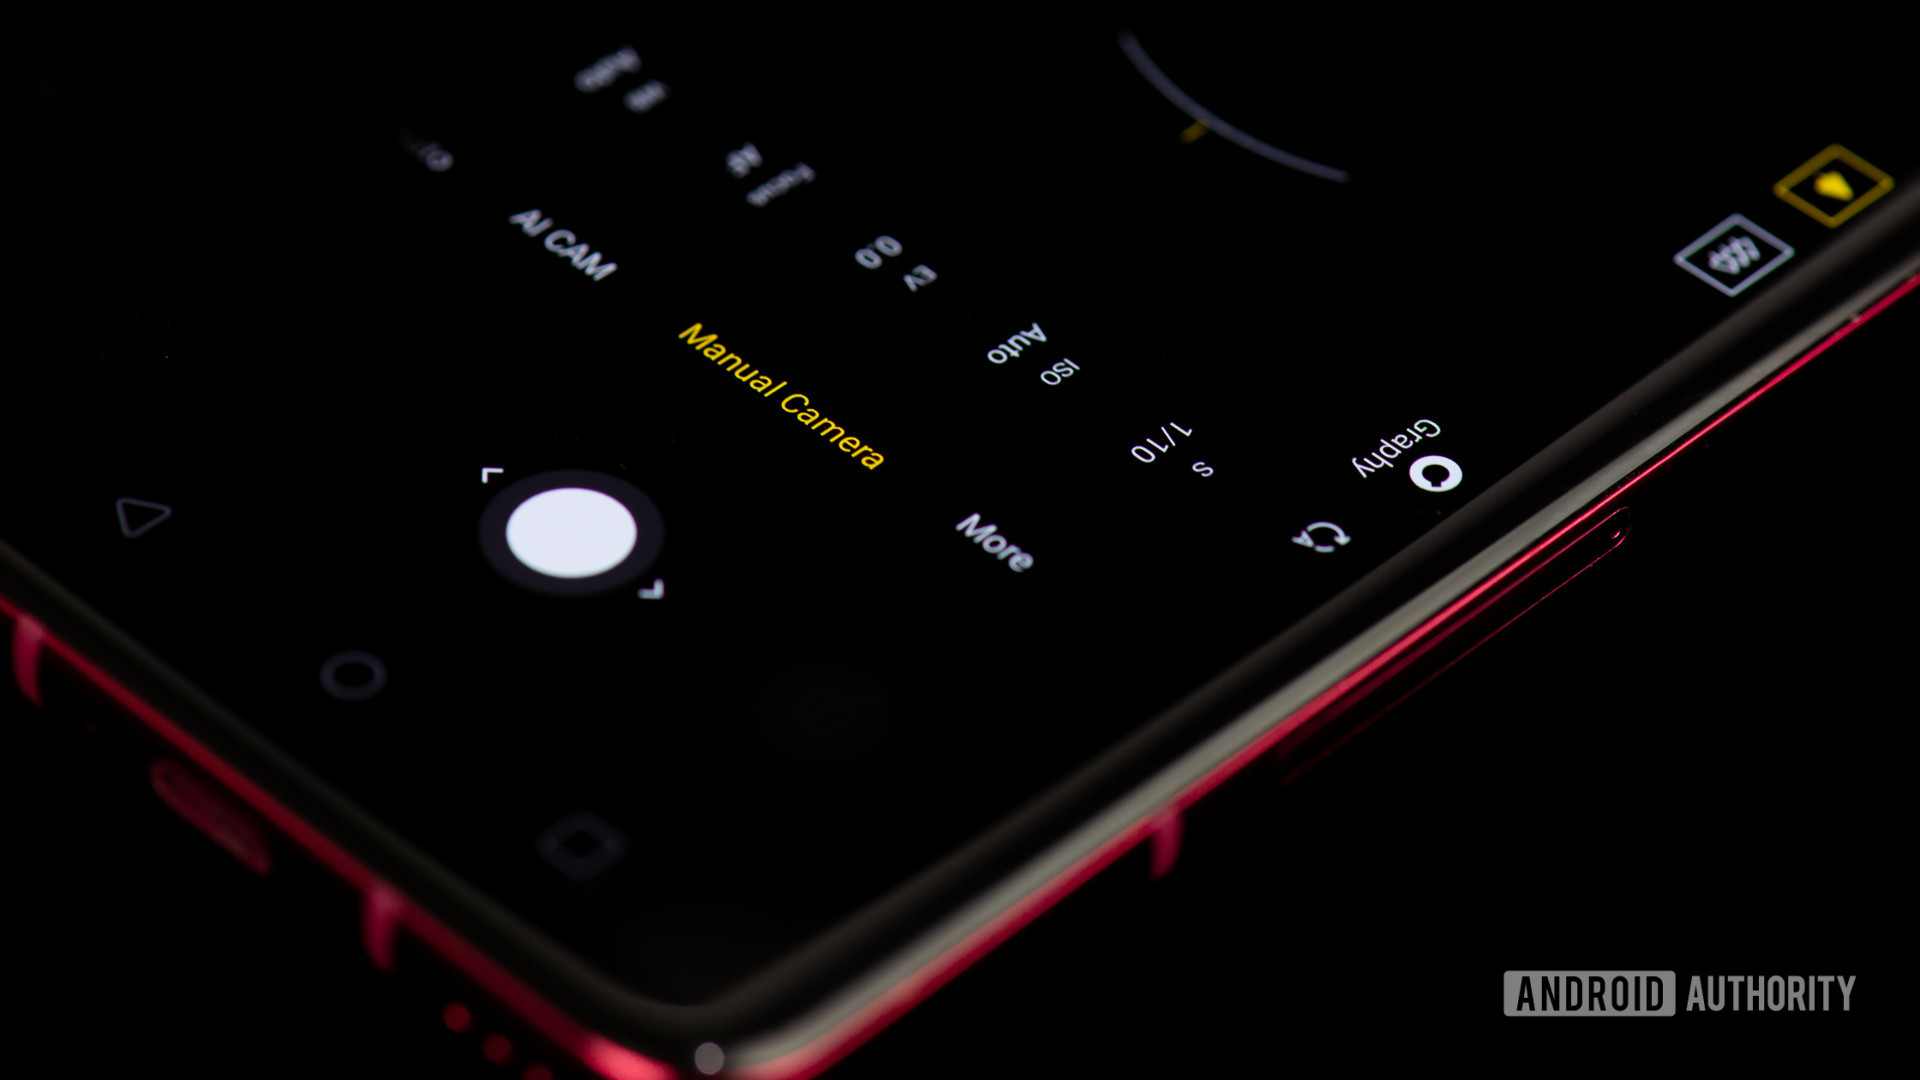
2) Make Use Of The Manual Mode
Although the auto camera setting makes it easier even for noobs to take a picture, achieving great-looking nighttime photography tells a different story altogether. Switch your camera settings into a manual mode. Depending on your phone’s model, look out for essential settings like ISO, aperture and shutter speed that allows you to manually adjust them accordingly. For instance, increasing the ISO allows more light to pour in and make your photo look more visible. But be careful not to overdo it since higher ISO levels can result in obvious digital noise and graininess. So, try to experiment around and take a few shots with different settings and compare the result.
3) Enable Night Mode
Check your phone’s camera settings. Does it come with a dedicated night mode? If yes, it’s best to take advantage of it. Just like the name suggests, this particular setting works by digitally analysing a scene where you are looking to take a picture. What the night mode does include taking multiple exposures before merging every detail possible into a single image.

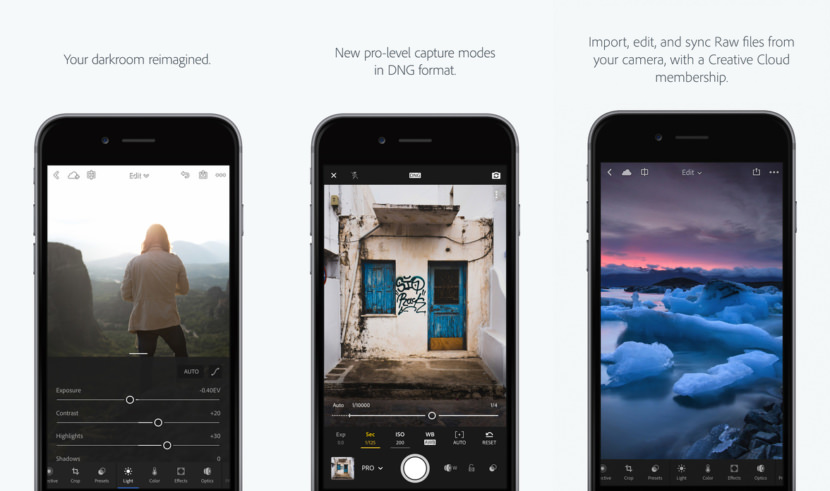
4) Shoot in RAW
Photos taken from a smartphone camera are usually saved in a JPEG format. This common file format compresses your images and does not take up much space of your phone’s storage. Because of the image compression found in a JPEG format, you will risk losing plenty of details as well. And this can particularly impact your low-light or nighttime photo results. So, if possible, try taking your picture using the RAW setting found in the default phone camera settings (e.g. Samsung Galaxy S10, iPhone 11 series). But if your phone doesn’t include a RAW setting, you can download a third-party camera app such as Adobe Lightroom, VSCO and Open Camera. Photos that are saved in a RAW format preserves all the data captured by the phone camera. The size of the files may be bigger but they are also lossless and uncompressed, giving you an extra advantage to edit your photo in post-production such as adjusting the colours and white balance.
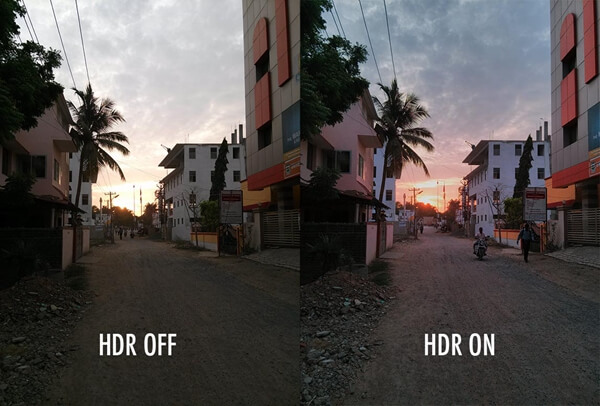
5) Turn On The HDR Mode
HDR, which stands for “high dynamic range” is technical jargon where three or five multiple pictures all taken in different exposures before being merged together with the help of a software to produce a single image. That image in question would highlight the best parts of your photo, making it brighter and clearer to look at. So, take advantage of shooting your best photo using the HDR mode. It is particularly useful in certain situations if you are standing in a low-light/backlit environment.
6) Pay Attention To The Environmental Light
Look around you. Does the background contain any source of light? Be it a neon signboard or a street light, make use of it to help illuminate your subject. Besides, taking a photo in a dimly-lit environment under a light source typically produces a better result than using the phone camera’s built-in flash, which can end up in harsher-looking images.


