


No matter how reputable the brand or how expensive a Windows 10 laptop is, you might find yourself facing a common problem. And that problem in question is your laptop’s performance suffering from a dip. It slows down on you and like it or not, it happens as time goes by. Of course, a sluggish laptop doesn’t automatically mean you need to replace it with a new one. Depending on your laptop’s condition, try tweaking it by following these 10 Simple Ways To Speed Up A Windows 10 Laptop.
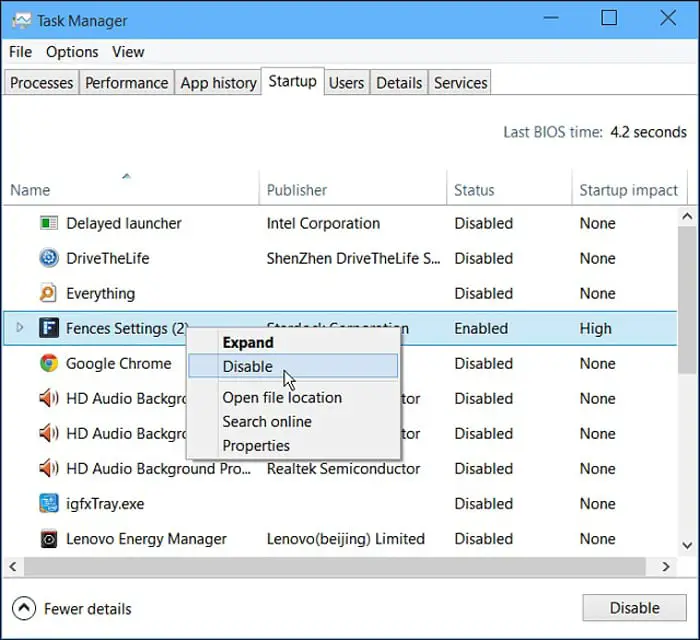
1) Disable Programmes At Startup
Ever wonder why your laptop takes a long time to boot up? Blame it on the programmes running in the Windows 10 background. And yes, too many of them can actually slow down your laptop performance. What you can do here is to minimise the number of programmes, particularly if you hardly use them. It’s pretty straightforward. Simply press Ctrl+Alt+Delete on your keyboard. From there, you will find a new window popping up on the screen. Select Task Manager and go to the Startup tab. You will see a list of programmes below. Choose the programmes that you rarely or never use, right-click the Status and choose Disable.
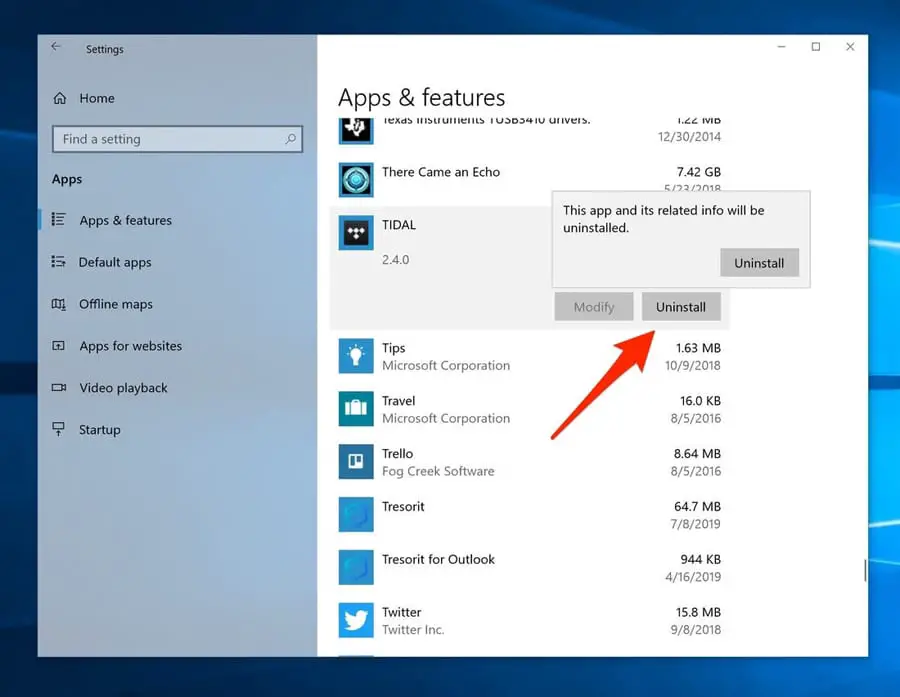
2) Get Rid Of The Bloatware
That bloatware that runs in the background of your laptop? It’s a nuisance, and you consider removing them. This is especially true if you have any rarely- or never-used programmes. To uninstall them, go to Settings from the Start menu. Click Apps and you will find Apps & Features on your right side. You will see the number of apps listed below. Find the unwanted app(s) and click on it to Uninstall.
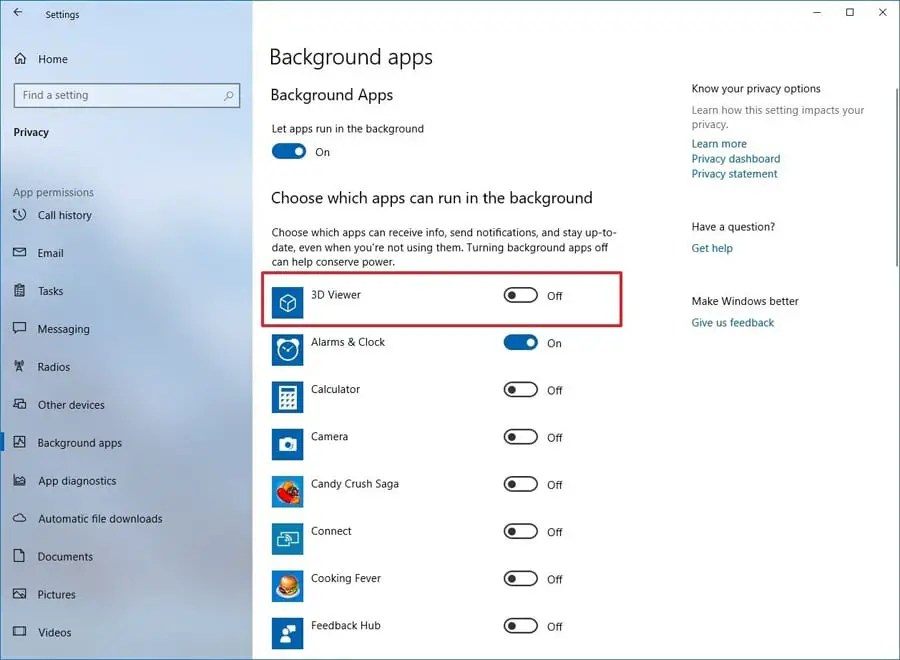
3) Disable Background Apps
Some of the apps that run in the background can decrease your Windows 10 performance. You can choose to disable them by going to the Start menu and choose Settings. Click on Privacy and select Background apps. See those “Choose which apps can run in the background“? You can turn the toggle switch for the apps from On to Off. This would disable them from running in the background.
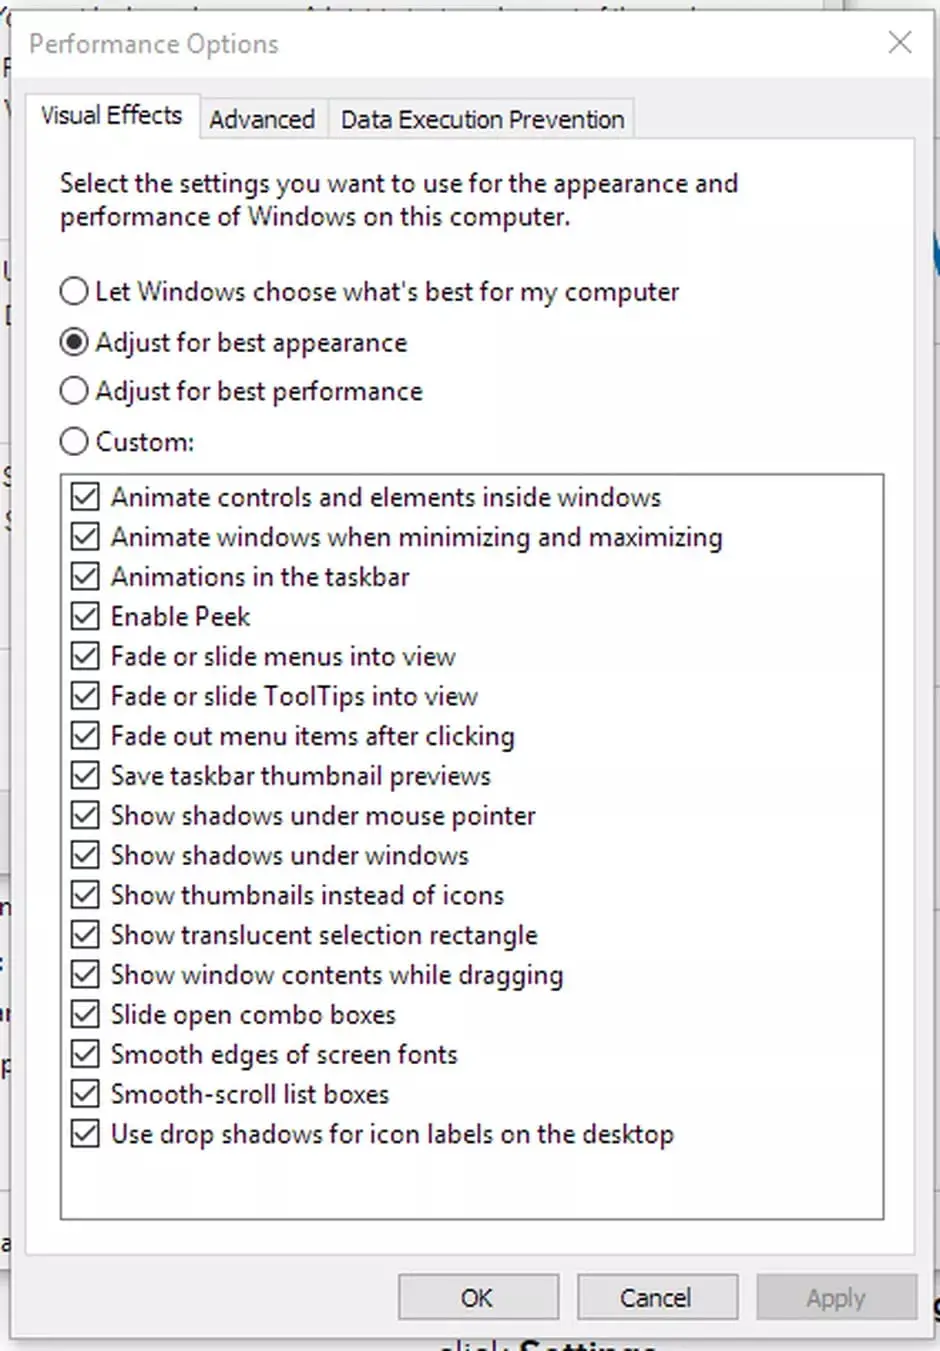
4) Disable Special Effects
From shadows to animations, these Windows 10 special effects can slow down your laptop performance. You can choose to disable them by going to Settings and clicking on System. Next, click About and look for System Info at your upper right side under the Related settings category. Click on that and you will be redirected to a new window. Look on your left and click Advanced system settings. From the Advanced tab, click Settings under the Performance category. Go to the Visual Effects tab and select Adjust for best performance. By doing so, it will disable every effect and animation.
5) Turn Off Transparency Effects
Here’s another Windows 10 special effect that can cause your laptop’s slowdown. Simply go to Settings, select Personalization and click on Colors. From there, slide the toggle switch for the Transparency effects from On to Off.

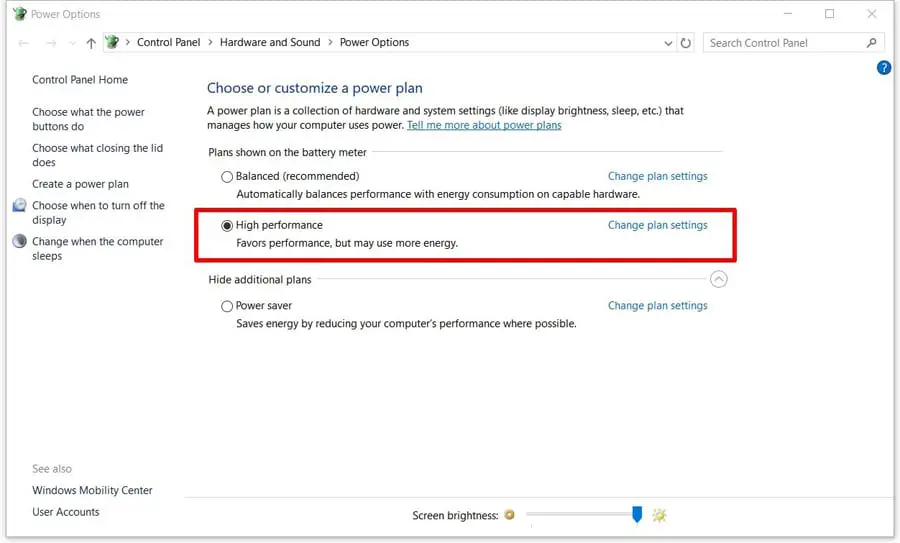
6) Level Up Your Power Settings
Are you using a Windows 10 laptop set to the Power saver plan? While it may save energy, you have to sacrifice your laptop’s performance. You can easily tweak your laptop’s performance by changing your power plan from Power saver to Balanced (recommended) or High performance. Just go to Control Panel, select System and Security and click Power Options. You will see Balanced (recommended) and High performance below Choose or customize a power plan category. Click on either one of them, depending on your needs.
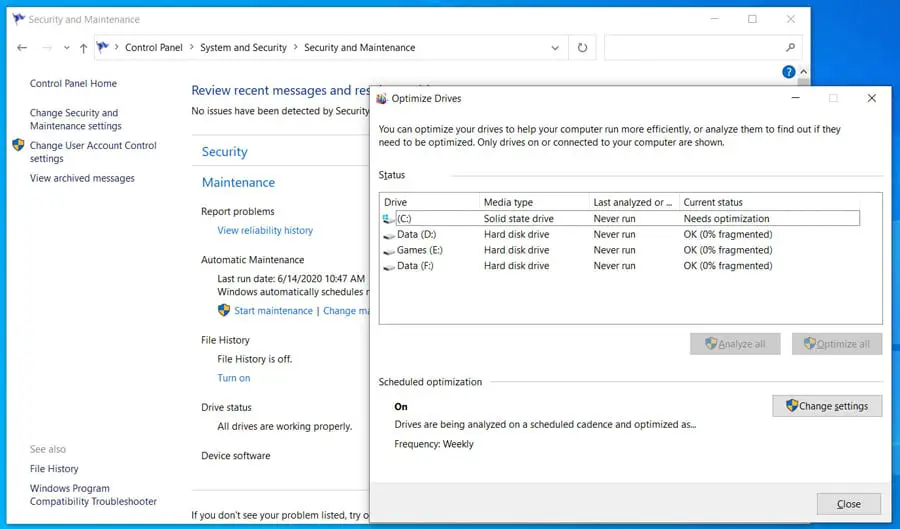
7) Optimise Your Drives
In other words, you need to run a defragmentation tool for your Windows 10 laptop. This is especially true if you use HDD, where running the tool will help to boost the system storage. To do that, go to Settings and click on System. Select Storage and under More storage settings, click Optimize Drives. Then, select the Hard disk drive from the Status list and click Optimize.
8) Free Up Your Storage Space
Is your drive running low on storage space? If that’s the case, it’s time to delete old junk files which have been eating up your laptop’s space. You can start by deleting the temporary files and to do this, go to Settings. Click System, followed by Storage and under the Local Disk section, click the Temporary files. From there, check the files from the list you wish to delete and click the Remove files button.

9) Switch to SSD
If you are still using a traditional hard disk drive a.k.a. HDD, it’s time to consider switching it to a faster one. Otherwise known as Solid State Drive or SSD, this type of drive may cost more than HDD but you will get plenty of benefits out of it in the long run. It helps to boot Windows faster and help run the programmes more efficiently. To put it simply, an SSD is designed to give your laptop a significant boost of performance.
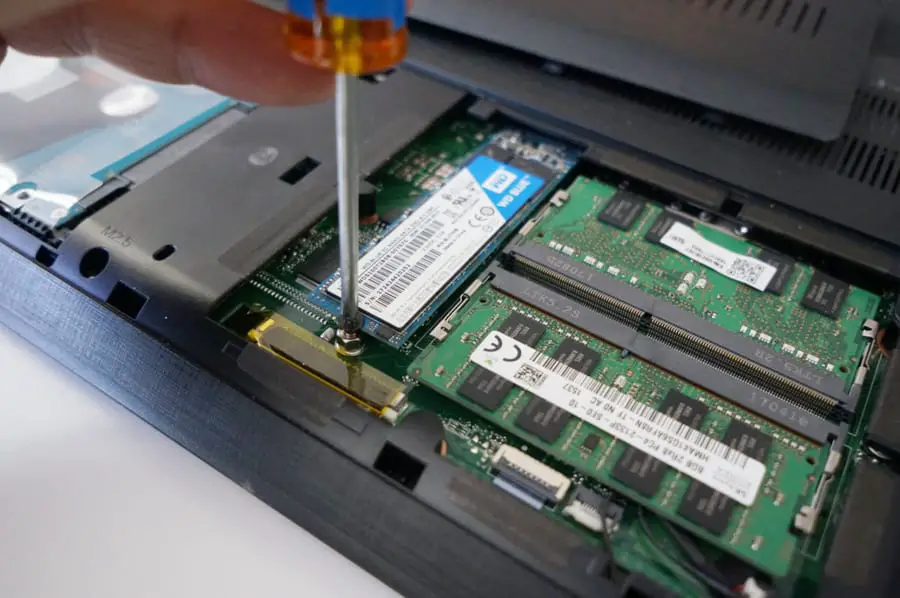
10) Install More RAM
Unless you purchase a laptop with a soldered RAM (read: non-upgradeable), it would help a lot if you add more RAM. This can be done by adding it to the extra RAM slot found at the internal bottom part of your laptop. Depending on your model, you can choose to upgrade your laptop’s RAM up to 16GB or 32GB. So, you might be asking yourself: “How much RAM do I need?” There’s no clear-cut answer for that because it all depends on your respective needs and usages.
For instance, if you are just using a laptop for basic computing tasks (e.g. Microsoft Word), 4GB of RAM should be enough. However, if you often multitask as well as running graphics-intensive software like Adobe Photoshop, gaming or opening multiple tabs on Google Chrome at once, you need to get at least 8GB of RAM. But if your budget allows and your laptop can support a higher RAM capacity, consider upgrading it to 16GB of memory for better efficiency and performance boost.


